Sunday, April 14, 2013

Grasshopper Model Roadway

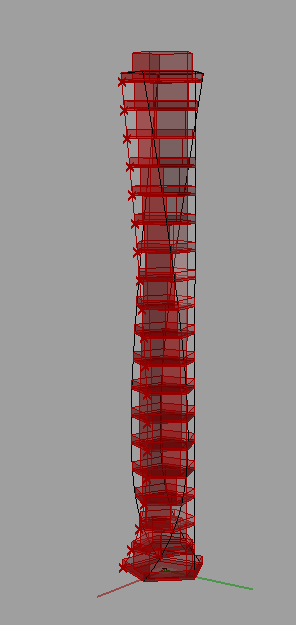
    As described in my previous post, over the last couple of days I was able to watch and replicate a number of grasshopper tutorials as I began to learn the program.  I starting this morning by replicating the tower mass tutorial from DesignReform.  It served as a reminder about the different commands and processes that I had learned in the program the previous week.  Then I felt inspired to see what kind of code I could create in grasshopper from scratch.
     My first attempt was to create a roadway that I could specify particular inputs for and have the entire object redefine itself.  All I wanted in the rhino model was the center-line curve of the roadway, all other aspects of the roadway should build themselves around the center-line   That way I could change the geometry of the road through the center-line curve in rhino and the roadway would stay intact (automatically update).  I also wanted to be able to control inputs such as number of lanes, width of lanes, thickness of roadway, color/material of roadway, color of parapets, etc, right within grasshopper.  I have plans to see if I can create a code to manipulate buildings next, and I was even contemplating the idea of creating a code that produced a gusset plate for a truss bridge based strictly off of the AASHTO and FHWA structural codes.  I would hope that the only thing the grasshopper code would need is input of member forces and angles framing into the gusset plate.  All other values and dimensions (such as gusset plate size, shape, thickness, number of bolts, bolt spacing, etc) would then be calculated within grasshopper and displayed in rhino.  Since it would all be derived from the structural codes, it would be an acceptable design for a gusset plate in real life.
     There were a couple of things that I found helpful throughout my week of learning this program.  First of all there are a lot of good explanations of the program components on the web, especially http://digitaltoolbox.info/grasshopper-basic/ and http://www.designreform.net/.  Also, I found myself using the offset function quite a lot.  This way I could create the geometry that I want right in grasshopper and have it update in rhino when other things changed.  Furthermore, I found that the option to "flatten" a stream of data can prove to be very useful when you can't figure out why something is not working.  At the conclusion of my first week with this program I think it is amazing and can't wait to further explore its capabilities and push its limitations.

TOWER MASSING TUTORIAL


ROADWAY DESIGN


Saturday, April 13, 2013

Learning Grasshopper

   After watching the grasshopper tutorials this week and getting a feel for the program interface, today I was successfully able to recreate 4 out of the 5 tutorials from the DesignReBuild website.  The 5th one I am planning to try tomorrow as a warm up before I create my own grasshopper file from scratch (not using a tutorial).  Thus far, I am very impressed with grasshopper as a program.  At work I tend to write code in VBA in excel quite often, so I am at least familiar with the idea of code writing.  Yet grasshopper put a very amazing twist into the entire process, giving the user a graphical-interface to use to essentially write code.  The syntax of a normal written code can be thought of as the components put into grasshopper and the "connection tubes" is like the normal flow of a program.  It is a very intriguing idea for a program and I am curious if any other applications for code writing/compiling will adopt this technique.  For example, with the large demand of smart phone apps and a larger number of app ideas from the users, I am surprised that I haven't heard of this type of interface for writing a smart phone app yet.
    Here are some images from my experimenting with grasshopper today.  I have yet to figure out how to implant the program files into my blog but maybe I will be able to determine it tomorrow.

Solar Shade


Point Distance


Two Attractor Points


Parametric Truss


Animation Part 2

    This week I did some additional research and found out how to use something called "video post" in 3ds max in order to render two camera views into one avi file.  It worked as expected and I was able to create my second attempt at animation from last week, one that contained both camera views.  There is still a large amount of improvement that can be done for my video but due to wanting to spend sufficient time in grasshopper this week I left those improvements for a later date.  So while you will see both camera views that I had originally made in this video, things like camera speed, object framing, and close up glimpses of the red Camera 1 object I have not yet fixed.  Anyway, take a look and let me know what you think.